Archive for January 2013

How do you like to do your fitting ?

January 26, 2013

More on personal sewing style – how do you like to fit ?

I reviewed fitting aids in a post on aids to well fitting blocks.
Most of those are methods of getting a pattern that’s a better fit than average.

This post is about ways of getting an existing pattern to fit better.

There are two groups of techniques involved :
– methods of fitting (here),
– if you make a fabric trial garment, then there are several methods for transferring changes from muslin to make a revised pattern.

There are many parts of the fitting process. Long ago I innocently assumed fitting was all well understood and everyone used the same method 😀 Now I don’t follow any one expert entirely, but combine tips from several.

– – –

Different basic approaches

Liechty et al Fitting and Pattern alteration show 3 different ways of fitting :
– altering the pattern, on the basis of differences between your measurements and the pattern measurements,
– tissue fitting,
– altering a trial garment (‘reading the wrinkles’).

Many people like to make as many changes as possible to the pattern before (or without) making a test garment. For that you need to analyse your fitting issues, and find the differences between your measurements and the pattern measurements. I thought I’d like to work that way, as I’m good at analysis and practical sums. But I’ve found I prefer ‘reading the wrinkles’ on a test garment. Look for sags and strains, and try changes to see what works. Without any need to analyse what’s wrong and by how much.

Fitting gets better with experience – you know what to look for and what to do about it.

There are some fit alterations where you need to add a wedge to the flat fabric shape, such as doing an FBA or allowing for a large behind. See my posts :
Fabric wedges below the waist.
Note on the FBA.

It isn’t necessary to do this wedge adding to the pattern before making a test garment. If you don’t minding slashing and spreading your fabric, it’s quite easy to add a wedge to a muslin. See the intro photos for Lynda Maynard’s fitting class at Craftsy if you’re not familiar with this technique. Drawings and written instructions in Liechty et al Fitting and Pattern alteration.

It is possible to do this on yourself. You just need patience to keep taking the muslin on and off while you test different size darts or widths of added strip. I add temporary front openings if need be, to make it easier.

It is easier if you have a fitting buddy. I haven’t, but I have got patience. Use a full-length mirror in good light. Light from the side shows wrinkles well. Other people find taking photos is a big help, but that’s not something I’ve tried.

Tissue fitting – loved by many but not for me. I like to keep the starting point pattern intact – I’m the sort of person who puts the pattern back in the envelope using the original fold lines – eek 😀 Fitting buddy essential for tissue fitting, preferably someone who knows about fitting alterations. You only have half the garment, and how do you pin the centre back in place on yourself ! If you do want to try this, lots of guidance in Palmer-Pletsch books and DVDs. Though remember that tissue paper and fabric don’t behave in the same way.
I used to have all their books, much loved by many but they never answered my questions so I’ve passed them on.

Another advantage of testing the fit on your body (tissue or fabric) is that you can adjust lengths, shapes and positions of style elements, etc. until they flatter your face and body shape.

– – –

Some specific fitting guides

There’s a huge range of general methods and specific details used by different experts. Obviously fitting is one of my life quests, as I’ve tried a lot of them 😀

Since writing my post on fitting aids I’ve taken some courses on ‘reading the wrinkles’.

Sarah Veblen has a book Guide to perfect fitting, and pdf lessons with support videos at Pattern Review and videos at Taunton Workshops.
Detailed information, and personal help in the PR courses. Better content on fitting armholes and making a sleeve to match than I’ve seen in other courses.

Lynda Maynard – video lessons at Craftsy
Many examples of slash and spread on the muslin. (If you’re on the look out for ideas for fitting larger high hips above smaller thighs, Dolly is an example.)

I’ve also tried a class on changing the pattern before making a trial garment, Sandra Betzina on pant fitting at Craftsy. Reminded me that’s not a method I’m comfortable with.

P.S. 2018 – I’ve now taken some of Brooks Ann Campers’ fitting classes with video teaching, and they suit me very well. Having tried nearly every ‘works for everyone’ fitting method without success, I have at last got bodice and skirt patterns which fit, and without having to analyse my unusually long list of the fitting issues listed by Liechty et al. You start by drafting a pattern that is a first approximation to your shape, but most of the work is done by draping the fit of a muslin. Her classes don’t suit everyone, some don’t enjoy her cheery style and there is a lot of problem solving to do (with her help), but for me – hurrah !

– – –

Pattern with or without seam allowances

Pattern with or without seam allowances ? People feel strongly for or against.

You can make many fit adjustments if you cut wide seam allowances. If you’re not happy doing this by eye, you need to add them to the pattern before using it to cut fabric.

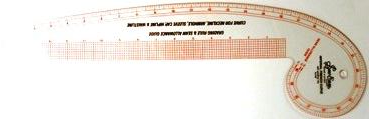
I find it easier to use a basic pattern without seam allowances. So I can draw round it to mark the stitching lines, and cut outside them. I have a transparent french curve with 5/8″ marked round the curve – makes marking stitching lines easy (here in UK).

”french-curve”

– – –

Reducing the effort of making a muslin

Some people avoid muslins like the plague. I have so many fit issues that making muslins has big rewards. I have reduced the hassle.

I use swedish tracing paper for a first test for a woven fabric, so I can trace a pattern and mark out a trial garment in one step. Best to use fabric close to the garment fabric for a final test. (P.S. 2018 – it needs to be ‘proper’ swedish tracing paper. Sadly what is now available in the UK under that name is just tracing paper, not like interfacing, and can’t be used for making trial garments. A sad loss.)

I have my basic blocks in card, with no seam allowances and the darts cut out, so I can draw round them easily.

”block-photo”
(Yes, top and bottom don’t match – I haven’t finished revising the top to fit my new waistline. Neckline and shoulders are still useful.)

Mark stitching lines, and horizontal and vertical reference lines, on the test garment fabric. Some experts use tracing wheel and carbon paper to transfer the lines from the starting pattern, then baste over the tracing with contrast thread. They warn against permanent marker pens. Sorry, those are what I use ! Another advantage of swedish tracing paper – you can just trace all those lines.

I confess I do the first fittings with the seam allowances sticking outwards, and without pressing the muslin.

– – –

Sequence of fitting

As well as the basic technique for making alterations (starting from the pattern or from a test garment), there’s also the sequence in which fitting issues are dealt with. Different experts start with different areas of the body. Try starting with your biggest area of difficulty. I find once I’ve got the shoulders / high back/ neck/ armholes right, most other issues disappear. But some fitting methods deal with the shoulders last !

I have sloping shoulders, a high round back, forward neck, unusual armholes. Many people like to start with an FBA. Or re-locating the bust point. One fitting system starts by getting the waist at the right height. For fitting pants, I first get the crotch extensions right. Other people may deal with large buttocks first, or waist/ abdomen larger than average. When you’ve solved the biggest issue, many other things may fall into place.

And how important is it to be able to move comfortably ? I test sitting down in pants, walking in skirts, reaching forward in tops. . .

– – –

How many muslins ?

I make adjustments to a test garment until it’s right, then make a pattern from the final version. Rather than going through a cycle of make pattern – test in fabric – revise pattern – make another muslin, etc. I do baste the changes into the muslin, instead of just pinning them. To stabilise the muslin before making more changes to it.

Some people like making many muslins so they keep everything neat and tidy. The most I’ve heard of is 7 muslins ! Sorry, I get screaming bored if I do this. I only started enjoying fitting when I realised it isn’t necessary to make a completely new muslin after each fitting adjustment. One of my personal limitations 😀

Though in an ideal world you do make a muslin from what you think is the final pattern, to fine tune the fit.

– – –

From muslin to pattern

If you make a test garment, transferring the fitting changes from the muslin to make a revised pattern is an essential part of the process. There are several methods for this. Here are a couple of them.

Many people, for example Lynda Maynard in her fitting class at Craftsy/Bluprint, mark the original stitching lines on the muslin, measure the distance away of the new stitching lines, and transfer those measures to the original pattern.

Personally, I find it easiest to make a new pattern : mark along the stitching lines of the finished muslin, then take the muslin apart, flatten it, and trace the stitching lines through to pattern paper.

– – –

I’m secure now about the methods I like for fitting, and for revising patterns. Though it’s taken several years and multiple false starts to get here. Many methods are not for me. (Tissue fitting – I tried it once, but never again 😀 Many other details of methods – I look at and cringe “no way”.) But I’ve learned something interesting or useful from most of them. And many methods I don’t enjoy are much loved by others.

There definitely isn’t “one size fits all” for fitting methods!

If you have a body shape fairly close to average, most methods may give you a good result.
If like me you’re well distant from average, you may have to experiment to find the fitting method you prefer.
If fitting involves a lot of work for you, best to think of it as a process of learning, exploring, improving – slow but sure rewards.

Find processes you enjoy, so you’ll willingly do this again 😀

– – –

First published 2013, links checked October 2021

= = =

Fashion editor picks for S/S 2013

January 19, 2013

Trends you might like to pick from, if any of them suit your style, shape, colouring.

These suggestions are from :
UK Elle magazine February 2013
UK In Style magazine February 2013
UK Vogue magazine February 2013 Catwalk Report
US Vogue/ Style.com Trend Report
YouLookFab’s comments on fashion week (whew, she says she watched ALL the on-line shows this time)

Colours

– all white
– all black (some designers have entire collections)
– black and white
see Style.com The Art of Contrast (click on left photo) – any style so long as it’s black and white !

– black and white with accent colour
– muted pastels or nudes

Strong colours too but they don’t dominate. The Pantone seasonal report shows them – a lot of emerald and greyed jade, primary red, deep blue and muted mid (Dusk) blue, also tangerine and sunflower yellow.
This season their neutral colours are called ‘Linen’ (warm light neutral) and ‘Tidal foam’ (cool light neutral).

”pantone2213-2”

Janice at The Vivienne Files has been using the Pantone colours as accents to her basic work and casual wardrobes.

Colour blocking still much in evidence.
see Style.com Collage Degree (click on middle left photo)

And underwear in these colours too !

What if these colours aren’t for you ? Here’s a video from Imogen Lamport on universal colours (none of the above :D).

Styles

– minimalism

– sports luxe
(see my posts on Sports Luxe patterns – Sweatshirts, Fleeces and hoodies)

– masculine edges one day, feminine frills the next, or both in the same outfit
see Style.com Alpha Females (click on 2nd right photo)
Style.com Every Flounce Counts (click on middle right photo)

– oriental, especially kimono
see Style.com Asia Society (click on right photo)
(see my post on Kimono patterns)

– sharp angles and boxy shapes
– retro – 60s, 70s

Garments

– blouses
– peplum jackets (see my post on peplum patterns)
– low waist jackets
– slim skirts with high slits
– trouser suits
– jumpsuits
Many dresses on show, but the editors don’t pick them out for emphasis.

Many styles of pants. UK In Style suggests :
– voluminous
– cigarette
– high waisted
– slimmer sweat pants
– dungarees (overalls in US)
– cropped (knee length) culottes.
Trendy to show a bit of ankle.

Ease levels

Relaxed slouchy tops, pants, jackets.
(see my posts on over-sized tops and jackets – Index page 6 on specific garment types.)

US Vogue/Style.com don’t pick out over-sized for emphasis, but slouchy is definitely a trend for casuals. And there is a general lack of body-con fit.

Here’s a post by YouLookFab on making the slouchy look with pants and another on the oversized look in general.

Lengths

Pretty well anything – knee length emphasised, especially for shorts.
Editors disagree on the maxi.

Fabrics

– leather
– plastic – opaque or transparent
– metallic look, shiny (especially gold)

– a light floaty layer, or insets of sheer fabric
see Style.com Veiled Looks (click on photo 2nd from left)

Lavish detail :
– texture – woven, cut-out, add-on frills
– flowers on a background – in prints and textures : embroidery, lace, and 3-D additions (also on accessories)
Clover has tools for making fabric flowers, petalled flowers and flower frills.

Fabric pattern

The strong new pattern is checkerboard.

”vuitton-checker-2”
Louis Vuitton

More geometrics in bold wide stripes.

Many prints, especially flowers and ethnic.
Still a lot of pattern mixing.
see Style.com Collage Degree (click on middle left photo)

Accessories

Bags
Clutch handbags continue
see Style.com bags.

Jewellery
Big statement pieces
see Style.com Jewellery.
Best not to add jewellery to the strong patterns and ornately detailed fabrics.

Shoes
YouLookFab says : “Peep toe booties are the shoe of the season. Spring booties are also big, as are loafers, slipper flats, fashion sneakers, sandals with wide straps, flatforms and flat oxfords.”
Also many pointy toe shoes.
White shoes.
Simple flats or wildly ornate high heels and platforms.

see Style.com shoes.

Would you like to add some of these to your wardrobe ?

With my older muted colouring, I”m not such a fan of white as I used to be. I’d look very out-of-kilter in those checkerboards and strong stripes, but I like the fabric combining. I move rapidly on from collections which are all hard edges, but they’re obviously popular with other people. I’ll continue with soft Casual Luxe tinged with boho 😀 My favourite yoked tunics and over-shirts are in some trendy catalogues, even if they don’t get the fashion editors’ attention.

If you’d like a more everyday wearable view of the season’s possibilities, see Connie Crawford Spring predictions download.
Many suggestions for colours, fabrics, styles – fitted or slouchy, angular or soft.

Don’t want to have to think ?
Several independent pattern companies suggest ‘modern classic’ capsules for the season :
Hot Patterns
Silhouette Patterns
Style Arc
Or just pick from the newest patterns – they’re always current! Butterick-Kwik Sew-McCall’s-Vogue, Simplicity-New Look-Burda have all issued their early Spring collections.

And here are some suggestions from YouLookFab on what to do if the trends aren’t your style. While here’s what she’s thinking of getting herself this spring.

As usual there are many different points of view. So choose what gives you most pleasure.
Would any of these trends enhance your summer 😀

Links available January 2013

= = =

Change muslin, acknowledge original – raglan tee

January 12, 2013

This is my second post on whether to acknowledge the source of a pattern. Again I had no intention of making a different style, but had to make so many changes to the pattern to get something that fit and flattered, it looked very different.

My previous post on this topic was about a casual drop shoulder dartless pullover. One of many simple pullover tops that are so similar I didn’t feel obliged to mention the original designer. I felt my version was one variation on a very generic style. But commenters felt strongly I should acknowledge my starting point !

This post is about a raglan knit tee. It has a key feature I think the original designer does deserve credit for.

– – –

A knit tee

Here’s a photo and line drawing of the original – The Sewing Workshop Trio Tee by Linda Lee.

”swtrioteephoto”

”sw-trio-tee”

I didn’t notice when choosing this pattern that it’s close fitting, which isn’t for me.  The hips have negative ease, the last place I need stretched fabric.  The sleeves are so tight I couldn’t bend my average size arms, and the neckline was too small for my head.  Debated whether to use another pattern, but this is the only pattern I have with 2-piece raglan sleeves – extra seam along top of sleeve.  Which makes it possible to get a good fit over the shoulders without all the strain and drag lines at the armhole of a 1-piece raglan sleeve. 

Other people love the out-of-envelope fit of this tee pattern, so you may well not agree with me 😀 I’m a shirt rather than a tee person, for reasons of climate, body shape, and personal style. I only wear knit tops as loose over-layers.

So I’ve changed nearly everything except the armhole seam shapes.  It does still have the original general style elements : raglan 2-piece sleeve, near jewel neck.  But it is now a loose fitting top, not a close fitting one.  A different spirit.  So I wondered if the designer would be peeved to be linked with it if I said ‘derived from’ or ‘inspired by’.

Here’s the back of my ‘muslin’ (actually made of swedish tracing paper).

”swtriotee3”

‘Looks like a dog’s dinner’ as we say. I greatly prefer this slash-and-add method of working, and do it in a fabric test garment too. Some people make a new muslin every time they make a pattern change, but I would find that very tiresome. Of course sometimes things get such a mess I have to start afresh, and make a new ‘muslin’ for where I’ve got to so far.

– – –

Changes made

Parallel slash and spread strips in the sleeves. That solved 3 problems for me :
– wider sleeve,
– bigger neckline,
– bigger armhole.

Changed shape of the upper sleeve seam to match my sloping shoulders.

For pear-shaped ease, I had already traced from M size at bust level to XXL at hips, but wanted more. So there’s a wedge added down CB.

All that extra width at shoulder level meant the neckline dropped. But that solved a lot of lumpiness in the armhole area, and I need a big armhole to be comfortable. So I filled in the neckline rather than pulling it up. Then added a neckline the right shape and size for me.

The armhole is now low. If I wanted a version with higher armhole I would have to re-work this – pull up and re-shape at the shoulders and scoop out the armhole curve.

When I made the ‘muslin’ I thought the major issue would be how to make a high round back adjustment on a raglan style. That was the least of my problems ! – dealt with by the neckline fill-in and a small change to the back raglan seams.

Obviously I give comfort much higher priority than a close fit, however fashionable that may be 😀

Greatly changed ease and proportions from the original. But this isn’t a generic one-piece-sleeve raglan style. I specifically chose the starting pattern to meet my fitting needs. So the original designer should be acknowledged.

– – –

‘Muslin’

Yes, my tee ‘muslin’ is in swedish tracing paper – open down the front for trying it on. I think I remember the late Shannon Gifford suggesting you use a woven for your first test of a knit pattern. To be sure you’ve got rid of sags and strains. Instead of avoiding fit issues by depending on the knit fabric to deal with them. Which doesn’t always give a comfortable line-free garment.

Many people will be horrified by using this material to test a knit pattern. But it works for me. The knits I’m attracted to usually have little lengthways stretch. Of course using a non-stretch trial garment isn’t possible if you like body-fit or negative ease in your knits. And not sensible if you’re using a very stretchy fabric. (Pattern making books develop different blocks for fabrics with different amounts of stretch.)

– – –

Moving on with the pattern

Despite all the added ease, my version of this tee is too tight for me to wear in a non-stretch woven. I’m planning an enlarged version for wovens. Perhaps then make a top mimicking designer Koos’ triangle dress, see Vogue 1301.

”v1301”

And an even larger version for woven casual jackets. I like the look of the Cutting Line Butterfly and Bees oop jacket, also with upper sleeve seam. Though that’s a semi-raglan style – probably a better look for my sloping shoulders. [More pattern adapting needed to get that right for me, but I’ve now done enough raglan pattern work to feel confident about it.]

”cl-butterfly-bee”

– – –

I acknowledge the original for my raglan pattern was a named style from a named commercial designer.

For my fitting efforts in general – so far I have a raglan top and a dropped shoulder ‘dartless’ top. I still need to finalise a fitted top with fitted armhole. Yes, I know in proper personal pattern making you’re supposed to make the fitted bodice block first. But the casual and raglan blocks are easier – I don’t need an FBA, so just the shoulders and loose armhole to fit. When I’ve done the fitted block, I’ll have the key upper body patterns-cum-blocks. For a complete set of upper body basics I also need a dartless top with cut-on sleeves, but so far haven’t managed to get a good result for that style over my high round back and sloping shoulders. Though I have found a pattern making book which gives the guidance I need. No hurry, it’s a shape used for many easy patterns but isn’t essential. Skirt and pants are also well on the way. Then hopefully I can move on from focus on getting a good fit.

Would you enjoy doing all this, or would it not be at all your idea of a fun part of sewing 😀

– – –

Patterns and links available January 2013

= = =

Your favourites in 2012

January 5, 2013

WordPress keeps quite detailed stats, so I know a lot about your favourite content here during the last year. (No, they don’t keep a note of who visits what !)

People do tend to explore when they get here. Most days the number of ‘visits’ is more than twice the number of ‘visitors’.

WordPress themselves, in their annual report to me, said: “About 55,000 tourists visit Liechtenstein every year. This blog was viewed about 200,000 times in 2012. If it were Liechtenstein, it would take about 4 years for that many people to see it. Your blog had more visits than a small country in Europe!”

Hey 😀 😀 😀 Thank You

– – –

Favourite posts over the year

The various posts listing North American independent pattern designers, including
North American independent pattern designers update
together got over 40 visits a day.

Taken together, the two basic posts on pattern making
Pattern making – the formal route
Pattern making – easier fitting shell
come next. Over 35 visits a day to one or other of them.

Next top post was the one on
Choosing and changing necklines.
Over 20 visits to that every day.

And the post on the
Cheongsam dress
got over 15 visits a day.

– – –

Most visits in first week of posting

Building a wardrobe in small groups

The weekend this was posted, my blog got more than 1000 visits on both Saturday and Sunday for the first time.
And more than 5000 visits over the week.

– – –

The posts you made most comments on

Many useful comments on
Nine Body Shapes.
People suggested other body shape schemes which work better for them.

I particularly enjoyed the comments on
Style interest from accessories rather than clothes.
I think it’s very helpful to hear people describe their own wardrobe choices.

– – –

Links you followed

Some of the links in
Choosing and changing necklines.
Sadly the links I gave nearly 3 years ago are very out of date. Do a general search for ‘neckline’ to get some good possibilities.

The Vivienne Files

Nancy Nix-Rice wardrobe advice
The list of links to her newsletters is no longer on her site, so it’s worth signing up to receive them.

The top blogs you went on to were :
Stitches and Seams (Debbie Cook)
Ruthie Sews

– – –

Patterns you wanted to know more about

Happily the BMV sites have reverted to their previous url style, so my old links are working again.

Most of the pattern links in my posts are just followed up when the post is new, but there’s a few that several people look at each week throughout the year.

Not surprising, the McCall’s 2718 fitting shell with 5 cup sizes was popular.

”m27182”

Many people with more than B cup size find it best to buy this pattern by chest (upper bust) size, so the pattern fits your frame.
BMV chest size table here.

Many wardrobe patterns were popular, particularly a couple of soft styled ones which are now out of print.

Butterick 5472 cascade jacket wardrobe has been one of your top patterns ever since I first mentioned it.

”b5472”

Another was Butterick 5045, now also oop (includes a soft vest).

”b5045”

These wardrobes were only slightly less popular :

Butterick 5760 is a useful group of basic classics.

”b5760-2”

I used an intermediate style wardrobe, McCall’s 6519, as an example when talking about co-ordinates.

”m6519wardrobe”

For lovers of vintage there’s Simplicity 2154, a Jackie O style wardrobe.

”s2154”

Peplums got a lot of attention. The most popular pattern was for a coat : McCall’s 6442.

”m6442”

These were only a little less popular :

A basic top, Vogue 8815 was also one of the most reviewed patterns at Pattern Review in 2012.

”v8815”

And a stunning jacket from Chado Ralph Rucci, Vogue 1269 (with dress).

”v1269”

The most popular pattern of the year was a cheongsam dress, now discontinued – New Look 6812.
New Look 6203 is similar, now only a download pattern.

”nl6203”

And a simple shift dress, Butterick 5211.

”b5211”

None of my favourite ‘layering tops’ was a much visited pattern – ah well 😀

For a basic casual dartless top, the Burda Style self-drafted block got most attention.

– – –

How about making a whole wardrobe from these patterns 😀
They cover everything from business through casual to dressy, classic to soft or flamboyant, with fitting help along the way.

Anything here that you missed and would be interested to look at ?

Prefer to look at more trendy styles ? YouLookFab reviews her fashion best and worst of 2012.

Two key quotes from her :
“• Most Important Part of a Style Journey: To have fun along the way. 
• Best Thing About Our Bodies: They are never wrong. Clothes can be wrong, but our bodies are always right.” 

😀 😀 Say the same about your style 😀 😀

😀 😀 😀 😀 Happy New Year 😀 😀 😀 😀

– – –

Patterns and links available January 2013

= = =