Bonfit Bodice Patterner

Posted January 16, 2010 by sewingplums
Categories: fit of clothes

I recently got a Bonfit bodice patterner – a few dollars from ebay just to try it out.

It’s fun to have something you can physically hold and draw round to make a pattern. And obviously a lot of thought has gone into it. So it’s a pity the Bonfit patterner has many problems.

Initial impression and basics

My first reaction was that it’s overwhelming when you open the box. I can imagine people getting excited about a demo at a sewing show, taking the patterner home, opening the box, seeing the jumble of unexplained peculiar shapes, and never looking at it again. I don’t know if the video helps. The previous owner of my set hadn’t even unwrapped it.

The Bonfit patterner is a set of tough plastic shapes that slide relative to each other to alter width and length. I had to read the book slowly while looking carefully at the pieces. But once I got past that stage it is a method that ‘comes naturally’ for me, I like having something physical and robust. I haven’t tried but think it’s possible to draw round the template and mark stitching lines directly onto fabric without making an intermediate paper pattern.

Here is the basic set of parts. It consists of a ‘base’ piece (top right) with neckline shapes, plus an inset to change front to back neckline. Added to the side of that are fitted armholes for front and back, or a dropped shoulder piece. The body section is added below.

”bonfitbasic”

There’s a choice of three body pieces. One is for back, and for front without darts. Then there’s one with bust dart, and one with waist dart.

”bonfitbottom”

There are separate pieces for a variety of sleeves :

”bonfitsleeve”

and for collars :

”bonfitcollars”

The sections slide against each other in ingenious ways, so you can alter the usual width measures of :
bust
waist
hip.
And you can adjust the length measures of :
bust height
back length.
Everything else is standard, doesn’t allow for individual differences.

Instruction book : One reason why people go no further may be difficulty with reading the instruction book – small low contrast print, few diagrams. I know Bonfit had a lot of information to fit into a small space, but this book is not for a visual or physical person, while the patterner is.

– – –

How well does the patterner fit ?

Well, as usual that depends on the individual. Bonfit’s and McCall’s (fitting pattern 2718) shoulder lengths and armhole shapes are surprisingly different.

What about the big issue of cup size ?

The same body section is used for both back and front without darts. So back and front without darts are the same width, with different necklines and armholes.

This is standard practice for loose fitting casual styles with no darts. For example, the front and back at bust level of the tops in ‘Easy Sewing the Kwik Sew Way’ are the same. So although this can’t give a good result for people with a generous front, there’s no point blaming Bonfit for using standard practice (except of course if they claim to be helping you get good fit. . .).

More problems arise when using darts for a fitted pattern.

The front body section with darts is about 1/2 inch wider than the back section at bust level.

That wouldn’t work well for all women. McCall’s (fitting pattern 2718) has a choice of front patterns for different cup sizes (though they don’t say so on their website). The front-back differences in size 14 are :
A cup : front half pattern 1/4 in. wider than back at bust dart level
B cup : 1/2 in. wider
C cup : 3/4 in. wider
D cup : 1-1/8 in. wider
DD cup : 2-5/8 in. wider

So the Bonfit is the B cup size that most patterns are designed for. Anyone with a larger bust cup would have difficulties.

The section on fitting in the Bonfit book is short and at the end. If you are full busted you might well have discarded the patterner for its bad fit long before getting that far.

Full Bust Adjustment

A true FBA is an ingenious method of adding length and width in the middle of a front pattern, without changing the finished length of the neckline, shoulder, armhole, side, and waist seams. The bust and waist darts are deeper, and the shape of the armhole changes.

The Bonfit doesn’t cope with this well. The only thing they suggest for larger cup sizes is to widen the front pattern. As bust size and shoulder length are related on the patterner, changing front body width also changes front shoulder length. You might move the lower body piece without moving the armhole piece, but that wouldn’t give you the changed armhole shape needed for a true FBA. There is also no way of deepening the bust dart, or of increasing the centre front length without lengthening the side seam.

So if you want a good FBA, you need to make changes to the basic pattern produced by the patterner in the same way as you do with a conventional pattern.

What about other fit alterations ?

I have sloping shoulders and a forward neck. These aren’t included in the patterner. So I would have to make the sort of sloping shoulder alterations that I need with any pattern. But I think with this physical template that should be easy to do by pivot and slide .

– – –

Otherwise, for making other styles, it’s the same as any fitting sloper

Basically the Bonfit is an easy way of making a fitting sloper for average cup sizes. If you want to make classic basic styles, by just changing necklines / collars and sleeves, or to make basic slopers for a range of different people, then it could get well used. But to make styles other than simple classics, you have to draw a basic starting point paper pattern using the patterner, and then do conventional pattern making changes (described in the accompanying book). The Bonfit doesn’t automate pattern making for other styles.

And I think many pattern making instruction books explain the process much more fully than the Bonfit book, with more diagrams.

So if you already have a good fitting sloper, the patterner won’t make other styles easier for you. And if there’s anything unusual about your shape, I think you’d be better off doing the work needed to make a proper fitting sloper.

I wouldn’t expect to make anything other than basic garments from a patterner as I don’t enjoy the ‘cutting up a sloper’ method of pattern making. For other garment styles I prefer to do the alterations needed on a commercial pattern, so I am sure what style features I’m getting.

Conclusion

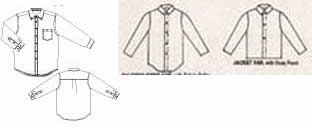
If you have average shoulders and an A or B cup, you may be able to draw round the bodice patterner direct onto fabric for the stitching lines of a basic repertoire of tops : tee, blouse, shirt, tunic, light jacket.

And there could be advantages for someone who needs simple patterns for a wide variety of people but doesn’t enjoy using pattern making software.

I think this only suits a small group of sewers. People have different personal clothing styles (classic, romantic, casual, etc.) and different ease preferences (close fitted, loose, etc.) We have different sewing style preferences (quick, couture, etc.). And there are also many different methods and preferences for pattern making. And many different methods and preferences for getting a good fit. I suggest the Bonfit patterner only works for a few of these.

Altogether, once I understood it I found the Bonfit patterner fun to play with. But I doubt whether it will get much real use, so I’m glad I didn’t pay full price. I may use the collars and sleeves, as they’re so easy to draw round. But I haven’t yet tested them for fit !

(P.S. 7 years later – when I moved and sorted out my possessions I threw most of the Bonfit away as I had never used it for drafting, but I have kept the sleeves and collars.)

Sewing Workshop layering wardrobe

Posted January 9, 2010 by sewingplums
Categories: my choices, specific capsules, wardrobe planning

We’ve had more snow here (southern UK) than we’ve had in over 30 years. Wardrobe plans with only a couple of layering pieces don’t warm my heart at present. Do any fashionistas mention double force thermal long johns or flannel lined pants. 😀

So I was interested to read about Linda Lee’s wardrobe for multiple layers. It was posted by Vicky in the Sewing Workshop thread at Stitchers Guild in April 2009 (page 15), and is based on her notes from a class given by Linda Lee in 2005.

Here is the ‘Capsule Wardrobe’ (edited from Vicky’s notes – thanks to her for posting). I don’t know what Linda’s current views are and hope this doesn’t misrepresent her !

Bottoms :

1. slim line pant.
2. soft pant in a silhouette and length that flatters your figure.
3. skirt in a shape and length that works with all of the tops.

Base layer :

4. basic tee or shell (knit or bias) that has your best neckline, shape and sleeve length.
5. surplice wrap tee or top.

More and more layers :

6. thin, sleek cardigan that goes over the tee shirts and under the vest or jacket.
7. vest/ sleeveless jacket that fits under jacket and coat.
8. shirt jacket, jean jacket, Miyake-esque shirt, or your version of a classic shirt that dresses down everything, works with the tee shirts and tops – ideal if the vest slips under or over this piece.
9. distinctive jacket that layers over cardigan and vest, under the coat.

Outerwear :

10. jacket/ coat or rain coat that goes with everything.

– – –

Vicky said Linda matched this plan up to Sewing Workshop patterns and showed how to alter the patterns for more variety. I (sadly) don’t know what Linda said, so here are my choices :

P.S. The Sewing Workshop site has changed since this post was written, so these individual links no longer work. Start here for Sewing Workshop patterns.

1. Slim line pant
Slim pants are good on me. The Zigzag and Kinenbi patterns are different styles. I would start with the Zigzag, as a contoured waist suits me and those vertical lines look slimming. I would leave out the ankle zip.

”zigzagpant”

2. Soft pant in a silhouette and length that flatters your figure.
There are two groups of fuller leg SW pant styles, ones with straight legs, and ones with a shaped leg, like the Hudson or Trio.

”triopant”

Only a tapered leg pant is flattering on me. Even straight leg pants give me ‘elephant legs’. So this is one part of this plan that I personally would leave out. I might try the Tahoe culottes, though they don’t look as if they would be good on a bike.

”tahoeculottes”

3. Skirt in a shape and length that works with all of the tops.
There are several interesting SW skirt patterns, but they are all ‘statement’ pieces. I think a more background style is needed to fit in to a wardrobe of co-ordinates. So I would pick the Oasis skirt.

”oasis”

4. Basic tee or shell (knit or bias) that has your best neckline, shape and sleeve length
Again there are several T patterns which make a statement in themselves, such as the Teegarden, Trio, and Urban patterns. But I think a simple design is needed to layer under other pieces. So I would pick the MixIt top for wovens,

”mixittop”

and the Milano T for knits.

”milanot”

5. Surplice wrap tee or top.
An easy choice as I love the look of the Salsa pattern.

”salsa”

5a. To fit my own wardrobe style, I would need to add a basic fitted blouse to layer between tee and cardigan, as I wear them all the time.
My favourite Sewing Workshop pattern for this would be the Tribeca.

”tribeca”

6. Thin, sleek cardigan that goes over the tee shirts and under the vest or jacket.
For me this would be a bought knit.

7. Vest/ sleeveless jacket that fits under jacket and coat.
As usual, Sewing Workshop doesn’t provide your average vest pattern. I like the idea of a soft drapey vest like the Poppy or Mimosa. But if it has to be layerable, I would choose the Peony vest.

”peonyvest”

8. Shirt jacket, jean jacket, Miyake-esque shirt, or your version of a classic shirt that dresses down everything, works with the tee shirts and tops – ideal if the vest slips under or over this piece.
This is the basis of Sewing Workshop style : many possibilities. If I had to pick only one it would probably be the Zona (with a bit of added flare for my hips), as those dart and seam lines are so interesting.

”zona”

9. Distinctive jacket that layers over cardigan and vest, under the coat.
Again this is a signature Sewing Workshop style, with lots of possibilities. For this purpose there are two groups :
One is jackets which would not layer over the shirt-jacket. My favourite is the San Diego.

”sandiego”

The other group is those big ‘arty’ rectangular jackets, which might layer over anything. Typical versions are the Ikina and Plaza. The Valencia is my favourite.

”valencia”

10. Jacket/ coat or rain coat that goes with everything.
As the final piece, an outerwear coat. I pick the Soho pattern, as outerwear with a hood fits so much better into my life-style needs.

”soho”

– – –

Well, I have a whole lot of other favourite Sewing Workshop patterns, but wouldn’t it be delicious to have this group 😀

Patterns available January 2010

Elle’s Four Winter Styles

Posted January 1, 2010 by sewingplums
Categories: current fashion, personal style

HAPPY NEW YEAR, AND HAPPY STITCHING IN THE NEW DECADE 😀

UK Elle (January 2010 issue) has 4 themes to keep us going for the winter. There are two casual styles which have all the pattern and colour, and two work styles, all black, grey and white.

They’re all different combinations of fairly classic shapes. The big difference is the jacket/ layering top chosen. All styles wear slim pants or leggings.

– – –

Note : Butterick-McCall’s-Vogue has changed their websites. My BMV links now only get you to a page where you can search for a pattern number.
I apologise that I haven’t changed to the new individual URLs, but it would be a lot of work.

– – –

Canadian Winter

Canadians may be entertained to know that UK Elle thinks we should be dressing like backwoods Canadians this winter – plaids, denim, sheepskins. Classic shapes except they have fitted not dropped shoulders.

Plaid big shirts, with yokes and pockets cut on the bias. These are North American homespun plaids, not Scottish tartan plaids. In bright reds and blues. Sadly most of the homespuns available from UK quilt shops are autumn ‘country’ colours.

Of course use Canadian patterns ! Here are the Jalie 2111 shirt (left) and the McPhee Workshop 305 He/She shirt. (Linda MacPhee’s patterns are good for people who like quick techniques.)

”canshirts”

Big warm knits, in fair-isle or scandinavian knitted-in patterns.

Sheepskin lined jackets, hats and boots, with outer wool, denim or suede. Elle doesn’t go as far as suggesting the big red and black fleece lumberjack style !

Jackets are classics. Convertible collars, fairly straight shape, may have yokes. A jeans jacket would be a good starting point. Can be worn shorter than the shirt. For a vest gilet in the same style, simply make one of these but sleeveless. Here’s the Jalie 2320 denim jacket. The line diagrams for the MacPhee 295 Jean jacket are very similar.

”jaliejean”

Remember to allow for the fur lining. I wrapped a strip of fake fur round myslf and was surpised to find it only increased my measurements by about an inch. It’s worth checking body, shoulder and sleeve ease. Or Kwik Sew 5259 is designed to be made with fur inside.

”ksfur”

An alternative is a padded blouson, see the Jalie 2108 insulated jacket, worn with a leather trimmed backpack.

”jaliepadded”

If you look round those sites, you’ll see Canadian designers know something substantial is needed for protection from a real Canadian winter ! Here in the southern UK we’ve had just a touch of snow so far. But some areas in North America are already well below zero. For that you’ll want lined salopettes, such as Jalie 2109 lined overalls (left), or Green Pepper (Oregon, US) 103 waisted and 113 unwaisted.

”salops”

Accessories : Fur-lined flat ankle boots. And aviator style sheepskin lined helmets, such as Kwik Sew 2613, or Onion 6006 accessories.

”helmets”

– – –

Casual Lounging

Long easy tunics or knits in soft luxury fabrics and yarns – silks and cashmeres, worn with leggings.

Taupe, light grey, pinky beige, nude colours, little pattern and some surface texture.

The long tops are usually somewhat loose fitting. The waist is not shaped, but sometimes marked by a seam/ casing or self-fabric belt. This is difficult to find a pattern for, as the line is at waist not under bust level. Easy enough to add a casing at that level.

This must be my style, as I want to quote patterns I’ve often mentioned before. Here are some possibilities (left to right) : McCall’s 5926 (oop), Kwik Sew 3718 (move the casing up a bit), Butterick 5185, McCall’s 5932.

”luxetops”

Accessories : Sheepskin lined flat calf length boots and big shawl scarves.

If you’re wearing this elegant couch potato/ winter recluse style, it looks as if you’re not expected to go outdoors, as there are no suggestions for warm jackets and coats or hats. My favourites are Vogue 8605 or Mizono Vogue 1145, which I’ve mentioned before.

”luxejkts”

How about a cashmere-alpaca fleece coat with a cashmere beanie, scarf and gloves 😀

But stylish people round here are wearing padded blousons or thigh length pea coats (see below).

– – –

Military

This is one of the more formal styles. The key to the theme is the jacket, worn with a white top and black or grey slim pants. Lots of buttons, studs if you like them. There are two related shapes.

One jacket style is short with princess seams and band collar. Basically the traditional hussar jacket, which is fitted and high hip length, with either an edge-to-edge front closure with lots of braid or frogs, or double breasted with shiny metal buttons.

Many pattern lines have one of these shapes, even already with added braid. Here are Kwik Sew 3466 (top left), Burda Patterns > Coats, Jackets > 7934, Onion 1031 uniform jacket (bottom left). Or for authenticity there’s Folkwear 133 Belgian Military Chef’s jacket.

”military”

The second jacket style is a double breasted pea coat with big lapels and collar, and shiny buttons again, low hip or thigh length. Most patterns are coats which can be shortened. Try Burda Patterns > Coats, Jackets > 8022, Vogue 1266, or oop Vogue 7978

”peacoat”

There is a touch of big shoulders in this military style. But otherwise the big shoulder idea seems to have disappeared. There are very few in the images Elle picked to preview next season. So perhaps big shoulders were a fad rather than a hint of a longer term style change.

Military accessories : this time the boots are unlined calf-length and heeled. Other accessories are all black leather, with studs and buckles. Military style square sided caps : Kwik Sew 3481, or Vogue 8528 View E for a softer look.

”caps”

— – –

Androgynous

More white shirts and black or dark grey slim pants, this time in very classic styles.

‘Boyfriend’ jackets and knits. These are long and straight, perhaps a bit over large. The jackets are an extreme version of the classic notched lapel style. The lapels are not only typically slim, but also very low. The ‘break’ of the lapel, where it starts to fold out from the front, is often below waist level. The ‘gorge’, the point which divides the collar and lapel, is also very low, perhaps below bust level.

Here’s an extreme version from Andy & Deb in Pantone Fashion and Home > Trends > Splashes of Sunshine for 2010.

”boyfrdrssm”

The true boyfriend style is of course tailored, with notched lapel and collar combination. I’ve had difficulty finding patterns for this very long lapel, can’t even find one for men !

(P.S. the new McCall’s 6043 suit has a lapel down to waist level, though not a low notch between collar and lapel. And it has very slim pants !
P.P.S. the new Vogue 8638 jacket pattern has long lapels and low notches.)

Drafting your own lapel collar combination isn’t a beginner project. You could try in Pattern Master Boutique. Set the neckline depth (on Settings tab) to it’s lowest for the ”break’. Set the Notch depth (on Collar tab) to its lowest for the ‘gorge’. Also make the lapel narrow.

Or for a simpler solution to get a touch of this look, make a straight jacket with a turn back from a deep V-neck front edge and add a cut-out notch, as indicated in the fashion sketch.

If you’re buying a long classic knit cardigan, choose one styled for women, so it has a neat fitted armhole and slim sleeves.

Accessories : more black, mainly crisp in line, or Chanel quilting and chains, or go frivolous and girly to tone down the masculine look.

– – –

All four styles include slim pants and leggings. ‘Canadian’ ones can even be in plaid 😀 Burda WOF magazine has patterns for slim pants and leggings in most current issues. Otherwise try Donna Karan Vogue 1039 (left) for pants.and Issey Miyake Vogue 1114 (right) for leggings, or Onion 0005 (in the speciality patterns).

”slims”

– – –

All styles have large square hand held bags, in their own typical materials : plaid, black, silver, fake fur, quilted. These don’t look like an attaché case but would be big enough for a laptop. Should be easy to make a fabric version. Basically a big square stiff sided tote, with leather or square cornered hardware rather than fabric handles. Much easier to make than what I thought was ‘the’ bag for this season, which is leather and covered in silvery metal : D-rings, buckles, eyelets, exposed zips. . .

Add of course a phone by Dior, Prada, or Dolce & Gabbana. 😀

– —

Patterns available December 09

Aargh about sergers – second version

Posted December 24, 2009 by sewingplums
Categories: sewing technique

I’m thinking about getting an overlocker/ serger, and I’ve now learned a lot about the problems !

I wrote a first post on this in a fit of aggro about how difficult overlockers are to use. Now I’ve found out more, and some of the things I said in my first post are wrong. I had looked at some reviews at Pattern Review, and didn’t know enough about overlockers to understand what the reviews are saying.

If you do a search for sergers at YouTube you get a whole lot of useful information. As I knew nothing whatever about overlockers before starting on this, I found the Expert Village series particularly helpful.

After watching those, then the Palmer/ Pletsch DVD on Serger Basics has a great deal of useful information about sewing, but nothing on threading from scratch.

I now have a little practical experience with one overlocker – the Husqvarna Viking HuskyLock s15, but don’t know how it compares with other models.

– – –

My dealer told me overlockers don’t need to be threaded from scratch. But that’s not true. They do need to be rethreaded if :
– a thread breaks,
– threads get tangled,
– the s15 is a 2/ 3/ 4 thread overlocker. It’s necessary to unthread the upper looper to use the 2-thread stitches or attach the 2-thread converter.

On some overlocker models, to rethread the upper looper, it’s necessary to unthread the lower looper as well, as the upper looper must be threaded first, without the lower thread in place, or the threads get tangled round each other.

On some models, it’s necessary to unthread the needles before threading the loopers, so the threads don’t tangle round each other.

– – –

As I have shaky hands, I want to know how easy the loopers are to thread from scratch. And I’ve found several things worth checking which are not mentioned in product descriptions.

Here are some YouTube videos about threading lower loopers :
Video 1
Video 2

It’s helpful to think separately about the thread path leading to the hole on each looper, and about getting thread through the final hole itself.

The looper thread path

First thing to check is how easy it is to place the thread into the path leading to the final hole on the looper. On some overlockers, part of this path is recessed, In the descriptions of their models, some manufacturers say they have threading aids. These move some parts of the path forward so it’s easier to access.

When manufacturers don’t say they have aids it usually isn’t possible to tell, without actually looking at the overlocker, whether this matters. For example, on the Husqvarna Viking HuskyLock s15, the path is relatively easy to access, so aids aren’t necessary. But it isn’t possible to tell from the product description whether this is the case. So it’s important to check when trying out a machine how easy it is to lead the looper threads along the right paths.

– – –

Threading the final holes

The next thing to check is the size of the holes at the ends of the loopers. These are usually quite small. On the s15 they are less than 1 mm. across. I don’t know whether any overlockers have larger holes than this, but I would have thought the larger the better, for ease of threading. So it could be worth comparing overlockers for the size of holes they have.

What I had been naively hoping/ assuming was that some overlockers have a mechanism for moving the final part of the loopers forward so you can get at the hole more easily. But evidently not. Well, those parts have to move so fast they need to be very robust.

Also I haven’t found anything, except for BabyLock jet air threading models, which fully automates threading the loopers including through the final tiny hole. All the other aids appear to be for getting the thread along the path, not through the final hole.

– – –

The next thing to check is how easy it is to access the space behind the holes in the loopers, either with fingers or tweezers. And how easy it is to see into the space behind the holes. When you are threading through the upper and lower loopers from front to back, you need to be able to see into and grasp threads behind the holes, to pull the thread through.

– – –

It’s also helpful to have good light front and back in the looper area. On the s15, the overlocker light itself is no help. That is arranged to light up the sewing area. But the looper area is shadowed from it by the presser foot and cutting mechanism. So you need good independent light when threading.

– – –

You may be someone who has steady hands (not me) and good eye-hand co-ordination, in which case you’ll be able to thread by hand, or using tweezers. (I wonder if it would be helpful to set up a big magnifying glass on a stand, like the ones embroiderers use !)

There are several tips for stiffening the end of the thread :
– twist the thread so it doubles back on itself.
– pull the end of the thread through beeswax (as used by some hand quilters and sewers).
– pull the end of the thread through lip chap stick.

– – –

If threading by hand is difficult, what about using a needle threader ?

For threading sewing machine needles, I particularly like the plunger type of threader. But I couldn’t find any way of using one on the looper holes.

It may be possible to use the type of threader with a thin wire loop.

On the s15, I couldn’t find any way of getting close enough to the hole in the upper looper to push the wire through, either from front or back. I would need to remove the presser foot and the upper cutter. I don’t know if other people could manage it, or if there is more room on other models.

It isn’t possible to get a wire threader through from back to front of the lower looper on the s15, but I did manage to get one through from front to back. What help is that, you might ask, if the thread needs to lead from front to back. Well, there is a trick I’ve learned from other uses :
Put a loop of thin thread through the loop of wire, not a single strand.
So you pull 4 strands of thread from back to front through the hole, using the threader.
And when you remove the threader, you have a loop of thread coming through the hole from back to front.
Put your looper thread through that thread loop, and pull it through from front to back.

Fiddley and slow, but it is possible.
I didn’t bother to complete this process on the s15, as I already knew I couldn’t manage the upper looper, but I did find I needed to use a light colour thread, so I could see it against the dark inside of the overlocker.

– – –

Some people use overlockers to do decorative stitching with speciality threads, not only metallic embroidery threads but also threads like perle cotton or even 1/8 in. embroidery ribbon. The easiest way of threading these thick threads through the small holes is to thread a loop of thin thread through the hole from back to front. and use that to pull the thick thread from front to back, as I just described.

So when you are trying out overlockers, take some speciality threads, and check it’s possible to get them through the holes in the loopers.

– – –

Some aspects of the threading videos to be careful about :

Different companies use colours in different ways : blue for one company means left needle thread, and for another company means lower looper thread. There isn’t an International Standard for serger colours ! So don’t just follow the colours in the videos, make sure you use the correct colours for your own overlocker.

Also different companies thread the threads in a different order, so don’t just follow the sequence used in one of the videos, but check the correct sequence for your own overlocker.

– – –

So, the level of information provided by manufacturers and dealers about sergers/ overlockers is poor. They just brightly say they are easy to thread, with minimal guidance about how to overcome the difficulties. It really shouldn’t be necessary to spend many determined hours on the internet, and reading books and watching videos, before you can find out how to operate the thing.

I think it’s essential to try before you buy. If you might want to do decorative stitching, take speciality threads with you. You may never find a serger/ overlocker that’s easy for you to thread, but at least you can look for one that is possible for you and that you can put up with the difficulties of.

For me, it looks as if threading an overlocker from scratch myself isn’t possible. I have to decide whether I’d use it enough to invest in a BabyLock Eclipse with jet air threading, so I don’t have to face those pesky little holes 😀

=====
=====

Thanks to the people who commented on my first version.

Hatty suggested Pattern Review.

Faye Lewis said :
I hadn’t had any experience with sergers before I purchased mine either. I bought mine at a Singer store who promised threading lessons. Well they gave me one lesson the day I bought it, but when I got it home and had problems threading it I went back for another lesson and they were not that friendly about showing me again. I’ve had the serger for about 3 years now and still have problems threading that one looper. 99% of the time I don’t have to re-thread because I tie on at the top. I now own 2 sergers; and tie on with both.