Pattern making for front openings : 1b.adding extras to a front band
This post is a supplement to the main post on adding a front band opening to a starter pattern. That got so long, I’ve separated off this list of suggestions about what to do with your pattern once you’ve made it.
A zip or button band finishes the front opening edge – what to do with the neckline ?
The common neckline finishes are bias binding/facing, or a stand collar.
If possible, sew the neckline treatment after the shoulder seams but before the side and sleeve seams. It’s much easier to do it while the fabric is nearly flat.
This post ends with some ways you can vary the pattern slightly to make other looks.
– – –
Bias binding or bias facing
Often the neckline is finished with bias binding or bias facing.
Staystitch the neckline, as a bias strip doesn’t add any stability.
Here are links to some tutorials on bias binding.
I’m preparing a tutorial on sewing bias facing without distortion, not a quick process.
For dealing with the top corner where bias facing joins button band, and the bottom corner where hem joins button band, see examples in the two photo tutorials linked in the previous post :
100 Acts of Sewing
Guthrie & Ghani
– – –
Collars
Here’s a free pattern from Colette patterns with several collar ideas.
These are patterns for a top with no front opening, so can’t be used directly, but are a source of ideas. Simply add a curve with seam allowance instead of the CF fold ?
Collar between main body and bias strip
You can borrow many collar shapes from other patterns and add them into the neckline seam between main body and bias facing.

from McCall’s Sewing in Colour 1964
442 – baste collar to neckline.
443 – black overlayer is wrong side of bias strip :
– stitch together bias strip-collar-body,
– clip seam allowances so they lay flat when the bias strip is turned down.
bottom – turn down the bias strip, turn in its edge and sew down by machine, or hand stitching can be less visible.
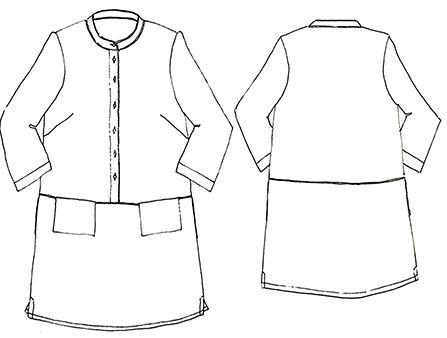
Stand collar
Finish the neckline with a stand collar which ends at the outer edge of the front opening, so it covers the top of the band. This may be called a ‘Mandarin’ collar. There may be a button if the ends of the band overlap.
Use a collar from another pattern.
Or here’s a post on making a pattern for a collar band which comes to edge of front, from The Creative Curator.
This is what you’re aiming for :

half size practice pattern from Czachor & Cole
The lower notch matches the shoulder seam.
The upper notch marks the end of the upper collar, if used.
Band collar sewing video from Professor Pincushion.
Here’s a detailed photo tutorial on sewing a band collar, from Andrea Brown of Four Square Walls. Use just the band, or both parts of a 2-piece collar.
Collar length
When adding a collar/hood you need to match the neckline stitching line lengths of body and collar/hood.
For most collars added into seam between main body and neckline finish (bias facing strip or standard facing) :
Match length of collar to – neckline length from CB to CF.
For stand/band collar :
Match length of collar to – neckline length from CB to outer edge of finished band (or outer edge of facing).
Notes in this post on how to measure the stitching line, and change the length of a collar pattern.
Another band collar
There’s another style of stand collar, called a ’Nehru’ collar, where the end of the collar band is inset from the edge of the front opening.
A more complex pattern make and sew when combined with front bands, so I’m not covering it here.

This sort of collar is tricky to combine with front bands but easy to add with a facing, see post on adding to a front-neckline facing.
– – –
Further pattern making and sewing
A few more ideas for a front opening finished with a band :
Two-part separate band
Add a seam instead of the centre fold of a separate band. Then there is a seam on both sides of the band, so you can add in decorative trims.
Add trims between main body and bias facing strip
Add piping, lace, frills, fringing etc. into the neckline edge seam between body and bias facing.
Neckline facing
Or finish the neckline edge with a true facing. See next post about facings : pattern making, sewing, using.
Can add a collar simply by using a full facing too, see that post.
Intermediate plackets
There are front band openings I haven’t included – I’ve gone for the easy ones.
Some which need intermediate levels of pattern making and sewing are :
Full length opening with covered/hidden buttonholes.
Half length opening : exposed zip, polo, henley.
Hmm – some day I’ll look for good tutorials on patterns for these. . .
– – –
As usual, many riches to add to your simple pattern making skills. With just a little practice, many styles can become do-it-yourself 😀
There are many little design decisions to make about openings. I give the conventions, but make adjustments if you want to.
Do what professional designers do – if it doesn’t work out quite right, change things a bit and try again.
(Megan Nielsen recently sent an e-mail describing the months of refinements that go into developing her patterns. In the Folds patterns has sent a similar e-mail – it sounds as if she makes at least half a dozen test garments. And we expect to get it right first time. . . )
Use your own judgement about what is right and what isn’t. Or collect examples of what you like.
Get to know your own wearing, designing, making preferences 😀 😀
– – –
This is part of a group of 4 posts about pattern making for front openings :
1. zip, button band
1b. adding extras to a front band (this post)
2. combined facing to front edge and neckline
2b. adding to a front-neckline facing
And here’s an earlier post on the opposite : closing a front opening.
– – –
Patterns and links available December 2018
= = = = =
Explore posts in the same categories: pattern making for clothes
December 6, 2018 at 3:20 pm
This is just what I was looking for! Thank you for your generosity in sharing your knowledge.
December 6, 2018 at 6:07 pm
Thanks for your comment Diane – I’m the sort of person who clarifies my thoughts by writing them out !