From Shirt to Pullover – close opening, check neckline
Changing from an open fronted design to a closed one looks as if it would be easy – just remove the button band.
But there are some important things to check !
– can you get your head through the neck opening ? – see below.
– can you get into the garment ? (links to advice below)
– – –
Removing the overlap
Removing an opening is fairly easy :
Assuming a front opening :
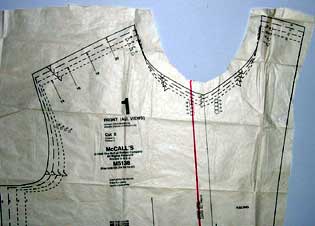
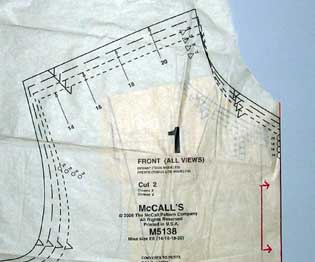
(If you’re starting from a pattern with a separate front band you’ll have to join the pattern pieces – overlap the seam allowances.)
Mark the centre front line (not the edge fold line) on the pattern (it should be printed on).
(I haven’t yet conquered high image quality, but hope the photos make the point.)
Trace the pattern to this line.
or
Fold the pattern on the line.
Add a note on the pattern, to remind you to place this edge on the fold of fabric.
Hey presto !
Though actually it’s essential to check the neck opening and underarm ease before cutting out.
– – –
Size of neckline opening :
Can you get your head through the resulting neckline neck opening ?
Measure your head. This is not your hat size, but your head measured loosely over hair, ears and nose. This is the size your neck opening needs to be for you to get it over your head. If you want to protect your hair-do or make-up, add an inch or two more.
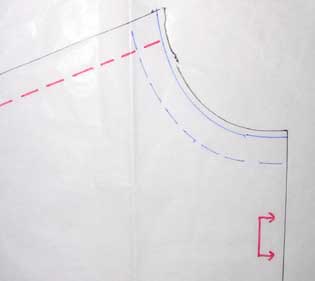
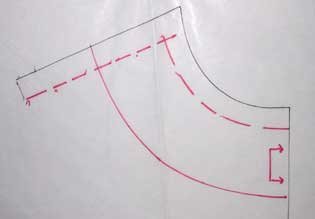
On the front and back pattern pieces, draw in the neckline and shoulder seam stitching lines. This is easy to do with a French Curve which has 5/8″ (1.5 cm) marked along the curved edge.
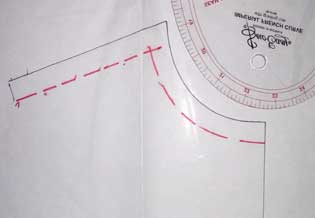
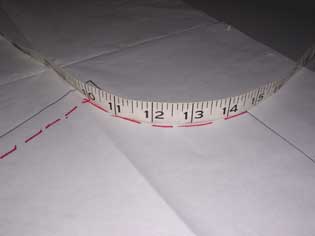
Measure the stitching line on the front and back patterns. Use the edge of a tape measure. Remember not to measure across seam allowances.
Then
(back neck stitching line length + front neck stitching line length) times two
is the length of the neckline opening.
Compare this with your head size.
For example, on my fitting sloper, the back neck stitching line measures :
3-1/8″
The front neck stitching line measures :
4-5/8″
So half of neckline is :
3-1/8 + 4-5/8 = 7-3/4″
And the complete neckline stitching line length is :
7-3/4 x 2 = 15-1/2″
My head measures 25″ (long hair up back of big head). So, if I want to use my fitting sloper as the basis for a pullover pattern, I need to make the neck opening much larger !
– – –
Changing the neckline
If the pattern neckline is not big enough for you, there are many things you can do.
To keep the same shape of neckline, lower the stitching line an 1/8″ (3 mm) at a time, until the opening is big enough.
Or redraw the front neckline to a V or scoop neck, or widen the neckline at the shoulders to a boat neck.
It’s easiest to change neckline shape if you retain the shoulder point (where neck line and shoulder seam stitching lines cross). Then you can alter the front without having to alter the back to match.
Or add a neckline slit, front or back. Or a half-length closable opening, such as an exposed zip or henley/polo button placket.
Or transfer the neckline from another pattern.
I’ve taken several classes with Shannon Gifford at Pattern Review. So I’ve learned to trace my patterns. If you’re doing that anyway, making small pattern changes takes little extra effort.
– – –
Edge finish
Whatever neckline finishing treatment you use, make sure to lengthen it to match the new neckline.
Making a facing pattern
It’s easy to make your own facing patterns. Draw a line 2-3″ (5-7.5 cm) from the stitching line. That is the outer edge cutting line of your facing pattern.
If narrow facings flip out for you, use the 3″ / 7.5 cm width. For me, this happens with wider necklines.
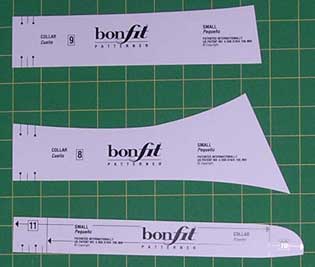
Lengthening a collar
If the pattern has a collar, you’ll have to alter that to match the new neckline.
On the body pattern pieces, measure the neck stitching line from Centre Back to collar attachment point on the front.
On the (half) collar pattern, measure the neckline stitching line.
Calculate the difference between the two.
This is the amount you need to change your collar (you measured half the body pattern, so it’s the amount to change half the collar pattern).
On a straight collar, alter at centre back.
These collar templates have a choice of lengths marked at centre back.
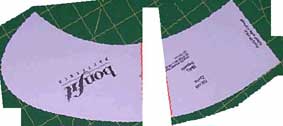
With a curved collar, mark the position of the shoulder seam. Then slash and spread, or slide, by the amount needed. You probably need to spread more at the outer edge of a curved collar, so it will lie in the same way as the original.
If you want to test your new collar pattern before cutting fabric, cut it out in kitchen roll paper. This has much the same firmness as interfaced fabric, and sticks to clothing without needing to pin it in place.
– – –
There are some more important questions about turning a pattern with a full-length opening into a pullover top :
– can you get it on over your shoulders/bust ? I’ve got so much to say on that, I made it a separate post.
– is there enough ease at bust or hip level to be comfortable ? That’s also covered in that post.
And here’s a post on ease in general.
– – –
Links available November 2009
= = = = =
Explore posts in the same categories: pattern making for clothes
Have you any comments or suggestions ?